How Can We Help?
How to print reports in KIS Desktop
The objective of this article is to walk you through on how to print reports.
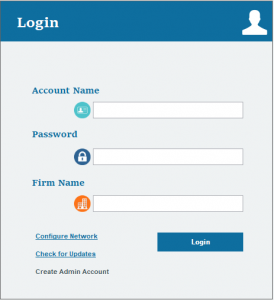
- Open the Keep It Simple Desktop software and log in.

- From your main screen click on the 6th icon from the top to bottom on the left-hand side labeled REPORTS.

- You will see 7 icon across the top of the screen CLIENT DATA, E-FILE DATA, BANK DATA, REVENUE SUMMARY, OFFICE REVENUE, RETENTION REPORT and QUICK CLIENT DATA.

CLIENT DATA

- You can select what type of Client Data Report you want to run by selecting the report from the Category drop box.
- You can base the report on particular information by choosing a specific topic from the Based On drop down box.
- You can narrow the report by selecting the type of Return Result from either Refund, Balance Due or Zero Due, and the type of Return Complete or Incomplete Returns.
- You can sort your reports by SSN, Zip Code or Phone Number.
- Now you can click on the MAKE REPORT blue button and create your report.
- You can Print or Preview the Report by clicking on the PRINT PREVIEW or PRINT THIS REPORT right above the MAKE REPORT button.
- If you wish to export the report to Excel Format, then click on the Excel icon located at the right of PRINT THIS REPORT.
E-FILE DATA

- You can select what type of E-File Data Report you want to run by selecting the report from the Category drop box.
- You can base the report on particular information by choosing a specific topic from the Based On drop down box.
- You can select a time frame for your report by checking the Include Period box and selecting the From and To date.
- Now you can click on the MAKE REPORT blue button and create your report.
- You can Print or Preview the Report by clicking on the PRINT PREVIEW or PRINT THIS REPORT right above the MAKE REPORT button.
- If you wish to export the report to Excel Format, then click on the Excel icon located at the right of PRINT THIS REPORT
REVENUE SUMMARY

- For a Revenue Report, you can Print or Preview the Report by clicking on the PRINT PREVIEW or PRINT THIS REPORT at the top right corner of your screen.
- If you wish to export the report to Excel Format, then click on the Excel icon located at the top right corner next to PRINT THIS REPORT.
OFFICE REVENUE

- You can select what type of Office Revenue Report you want to run by selecting the report from the Category drop box.
- You can base the report on particular information by choosing a specific topic from the Based On drop down box.
- You can select a time frame for your report by checking the Include Period box and selecting the From and To date.
- Now you can click on the MAKE REPORT blue button and create your report.
- You can Print or Preview the Report by clicking on the PRINT PREVIEW or PRINT THIS REPORT at the top right corner of your screen.
- If you wish to export the report to Excel Format, then click on the Excel icon located at the right of PRINT THIS REPORTS.
RETENTION REPORT

- First you must set the prior year path by clicking on the CHOOSE PATH button and selecting the folder for your prior year software.
- You can select the type of Retention Report you want to create by selecting from the drop box next to REPORT TYPE.
- You can select the time frame under REPORT DATE RANGE from today, month, year or period.
- You can choose to sort your report by the options on the drop box next to SORT BY.
- Once you have selected each option you can click MAKE REPORT.
- You can Print or Preview the Report by clicking on the PRINT PREVIEW or PRINT THIS REPORT at the top right corner of your screen.
- If you wish to export the report to Excel Format, then click on the Excel icon located at the right of PRINT THIS REPORTS.
QUICK CLIENT DATA

- Select how you would like to group your report from the GROUP BY drop box.
- Then select the search criteria from the SEARCH BY drop box.
- Enter the search words or numbers you want to search for on the VALUE box.
- Once you have selected each option you can click MAKE REPORT.
- You can Print or Preview the Report by clicking on the PRINT PREVIEW or PRINT THIS REPORT at the top right corner of your screen.
- If you wish to export the report to Excel Format, then click on the Excel icon located at the right of PRINT THIS REPORTS.
