How Can We Help?
How to register checks in KIS Desktop
The objective of this article is to walk you through on how to register checks.
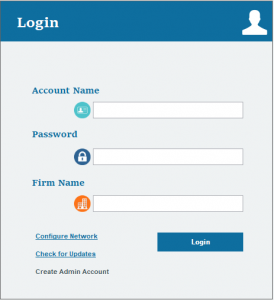
- Login to your KIS DESKTOP software.
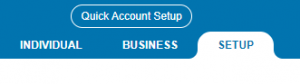
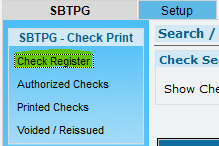
- Click on the SETUP Tab.
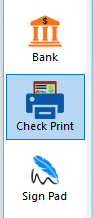
- Click on the fifth icon on the left side labeled CHECK PRINT.
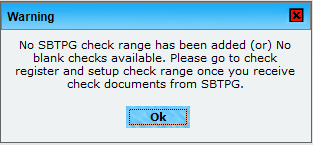
- A warning box may appear telling you there is no check range added. Click OK.
- At the top left corner, you will see several links, click on the second link that says CHECK REGISTER.
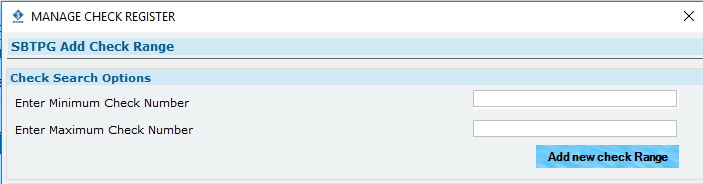
- Click on the button located at the bottom left corner labeled ADD/DELETE CHECK RANGE.
![]()
- Enter the Minimum Check Number and the Maximum Check Number and click ADD NEW CHECK RANGE.
- Your Check Register will generate the check stock you entered.