How to add a login account to an access level
SUMMARY
This article demonstrates how to add a Login Account to an Access Level.
MORE INFORMATION
13 STEPS
1. Click Logins
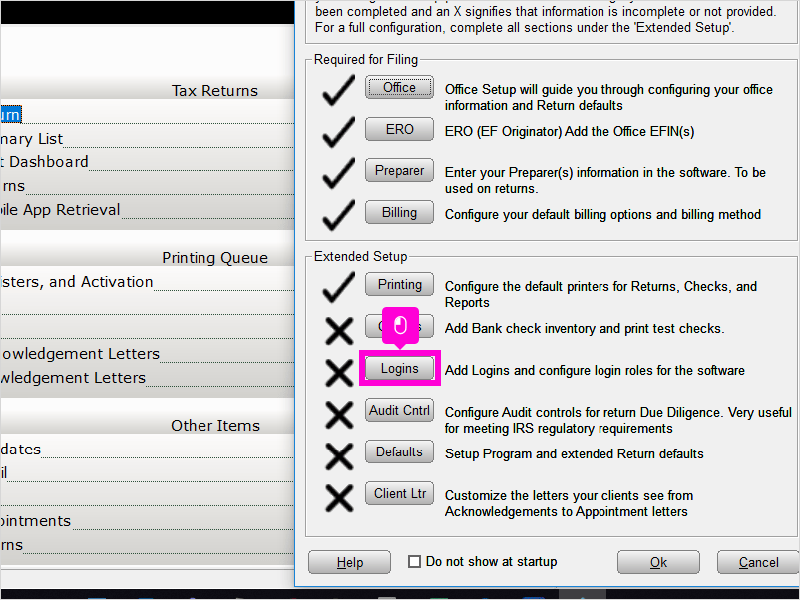
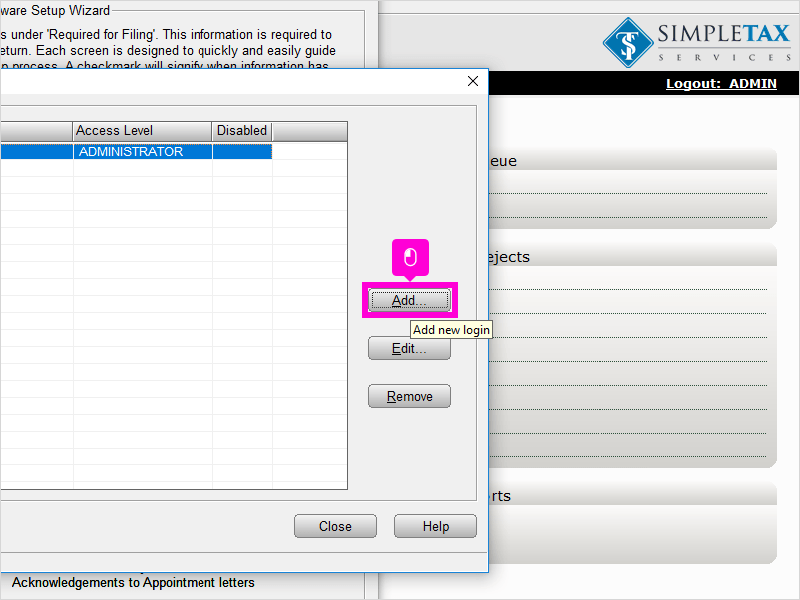
2. Click Add…
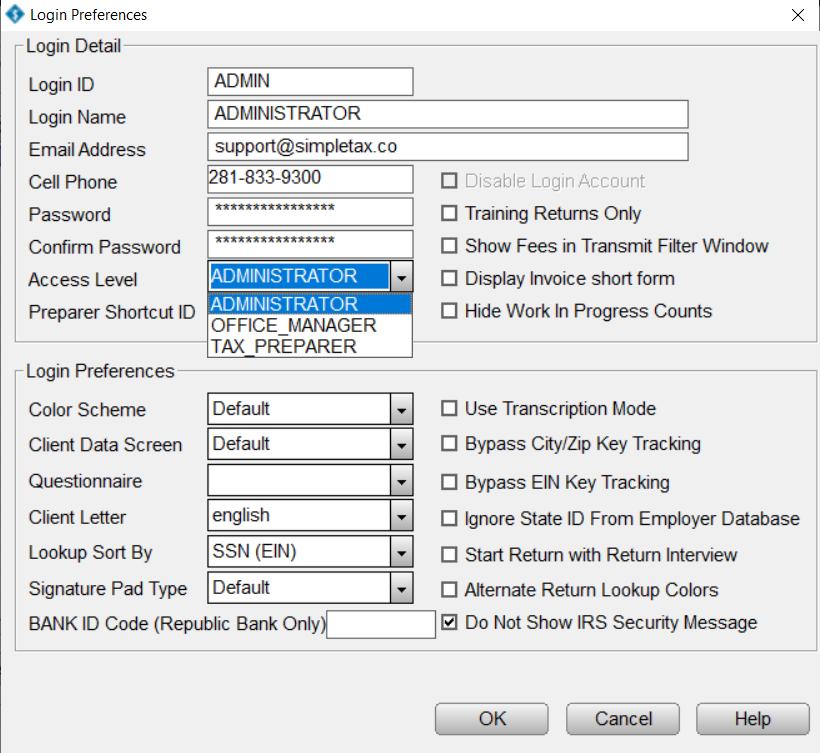
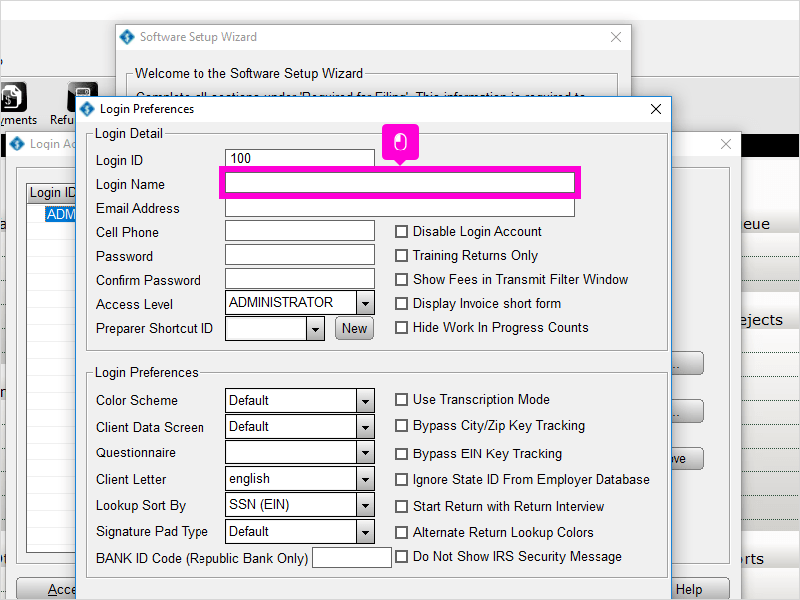
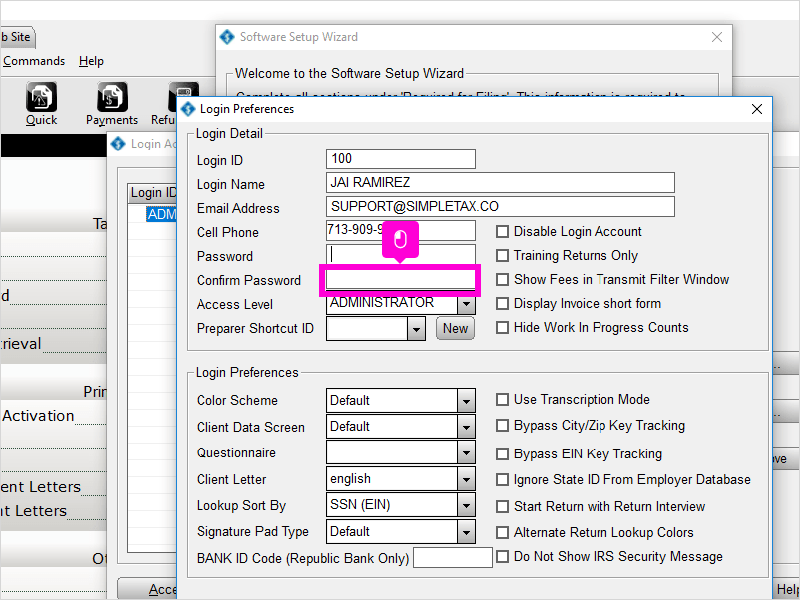
3. Enter a Login ID
That will be what they use as their login.
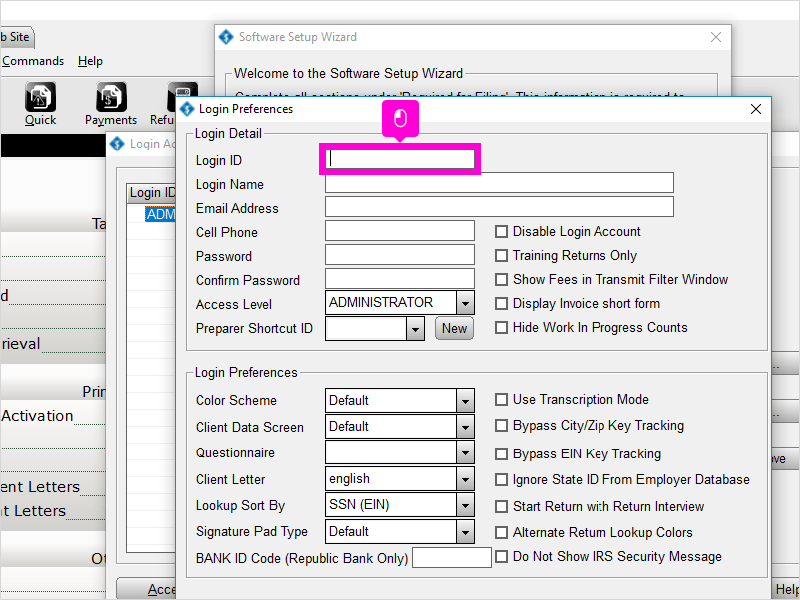
4. Enter a Login Name
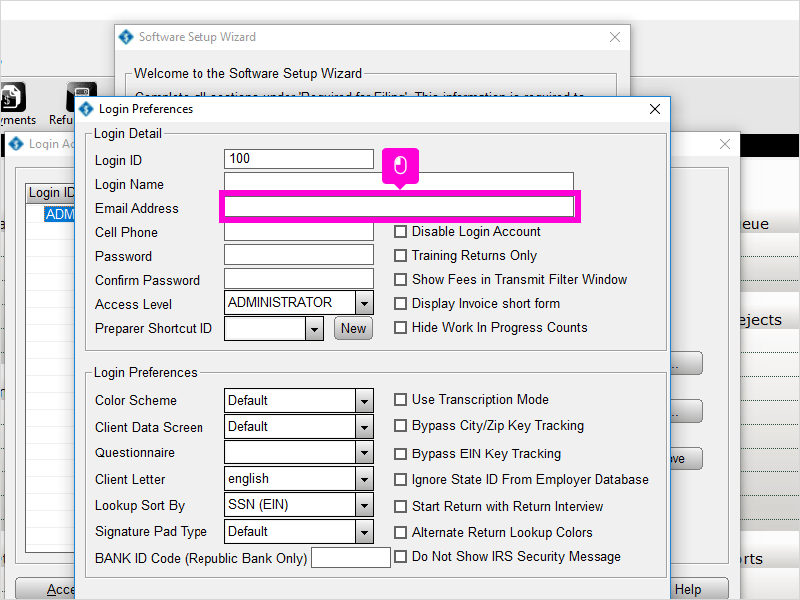
5. Enter an Email Address
That is the email they will use if they ever need to reset your login password.
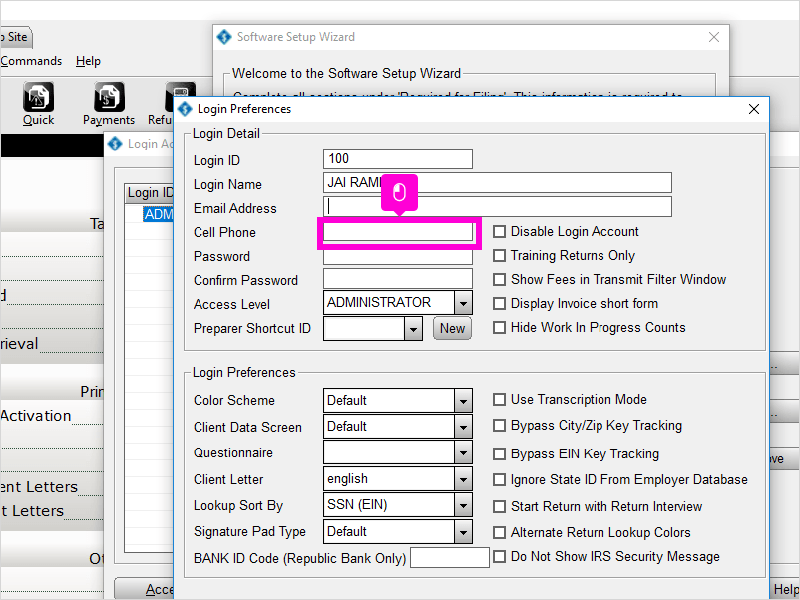
6. Enter a Cell Phone Number
That is the email they will use if they ever need to reset your login password.
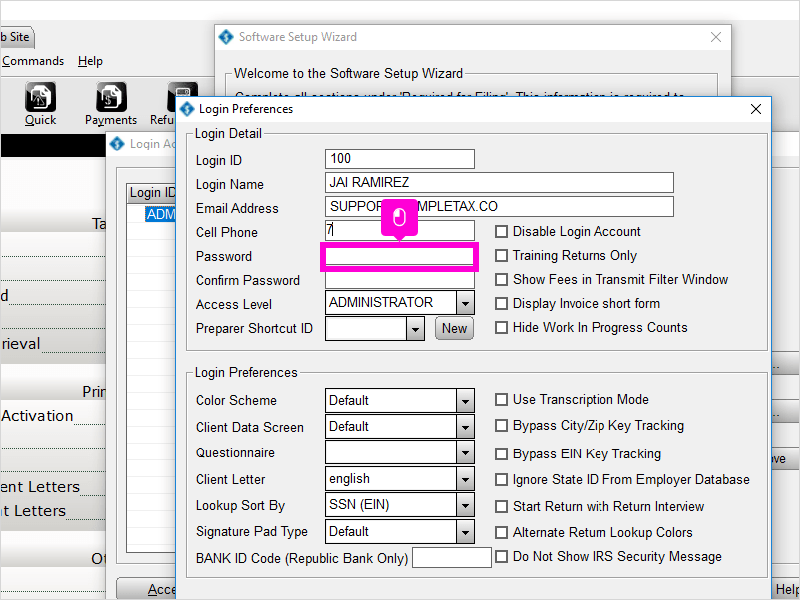
7. Enter a Password
8. Re-enter your password to Confirm Password
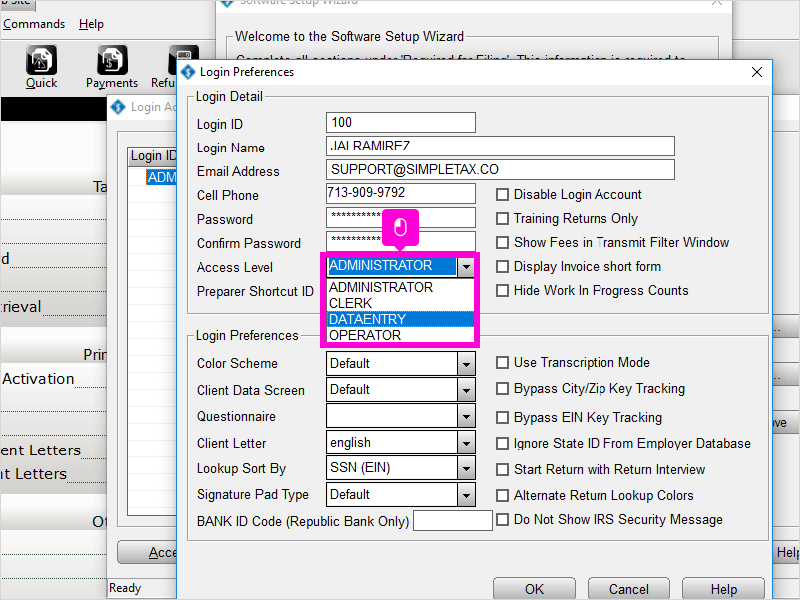
9. Select the Access Level from the drop down list that you want this login to have.
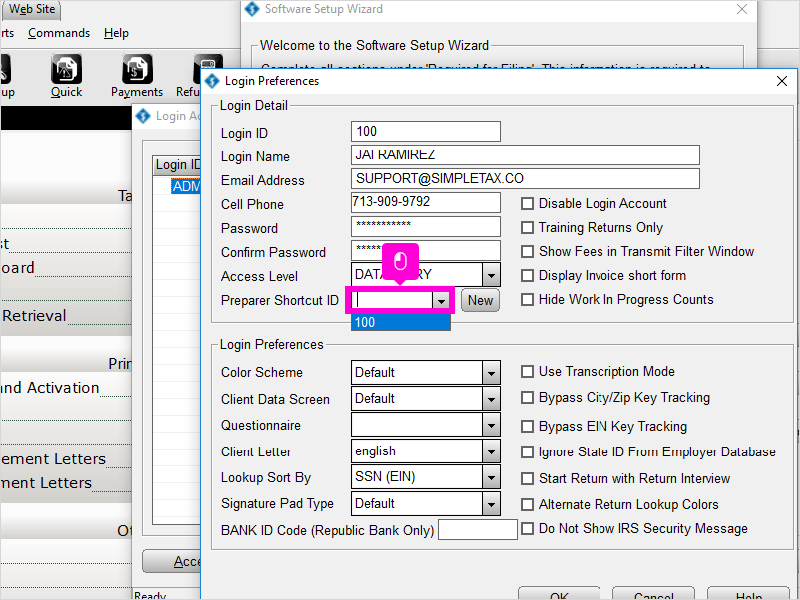
10. Select the Preparer Shortcut from the drop box list to link the Login with the Preparer.
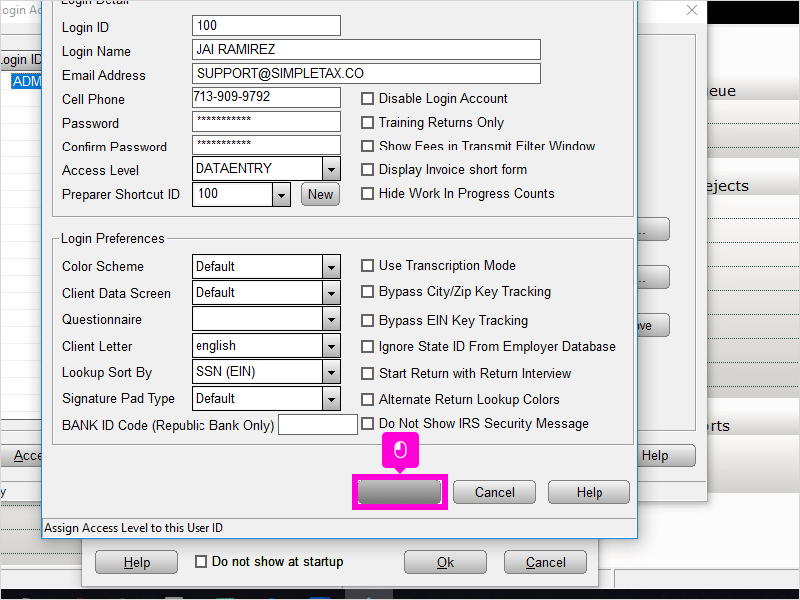
11. Click OK
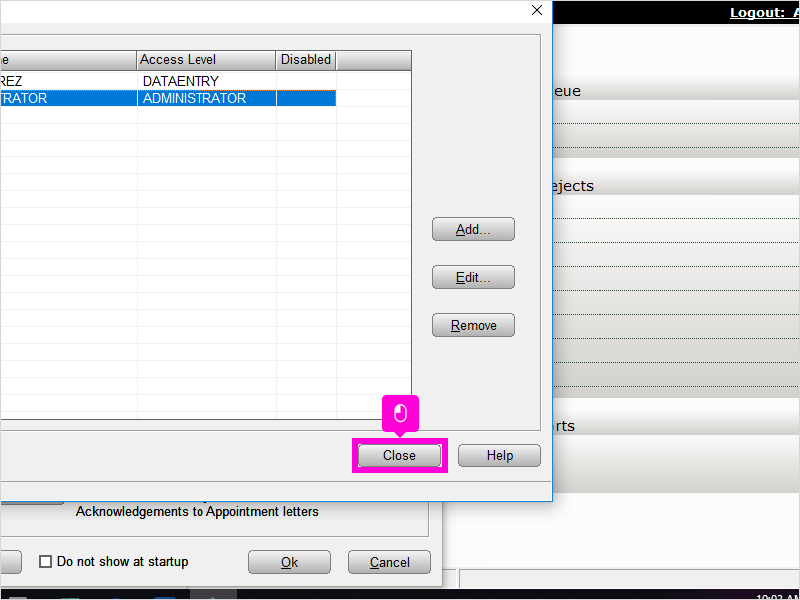
12. You can Edit or Remove a Login by highlighting the login account name and then clicking on either Edit or Remove.
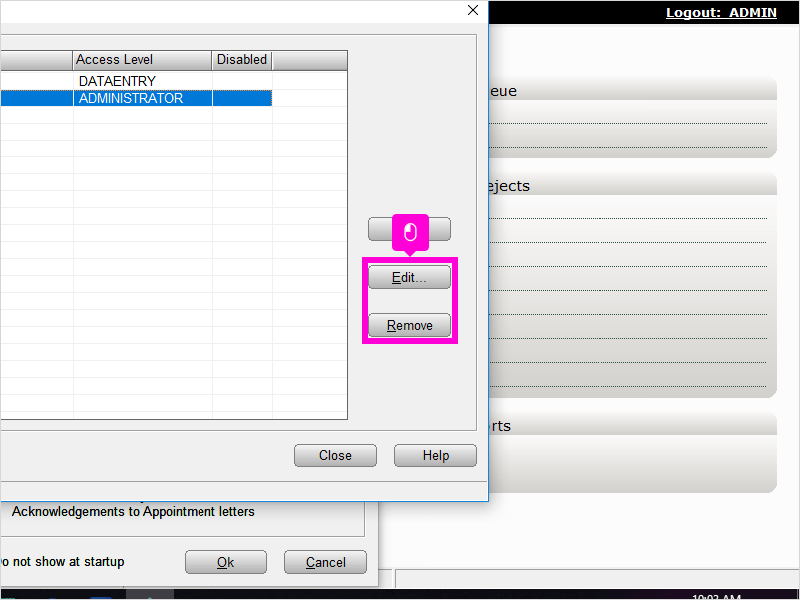
13. Click Close You are Done!
Here’s an interactive tutorial
https://www.iorad.com/player/1691471/Software-Setup-Wizard-for-Logins
Belonging to an Access Level gives a Login Account rights and abilities to perform various tasks within Simple TAX 1040. You can choose which rights and abilities a Login Account has by adding the Login Account to the appropriate Access Level.
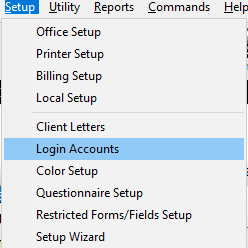
- On the Setup menu, click Login Accounts.
- In the Login Accounts box, click the Login Account you want to edit and then click Edit.
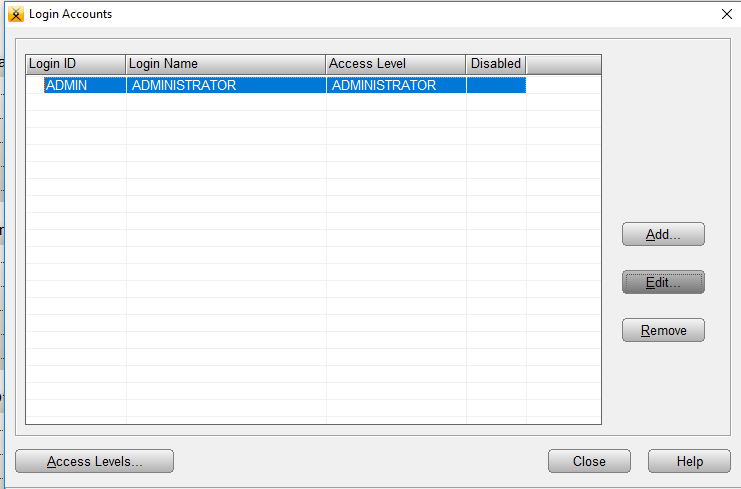
- In the Access Level list, choose the Access Level you want and then click OK.